
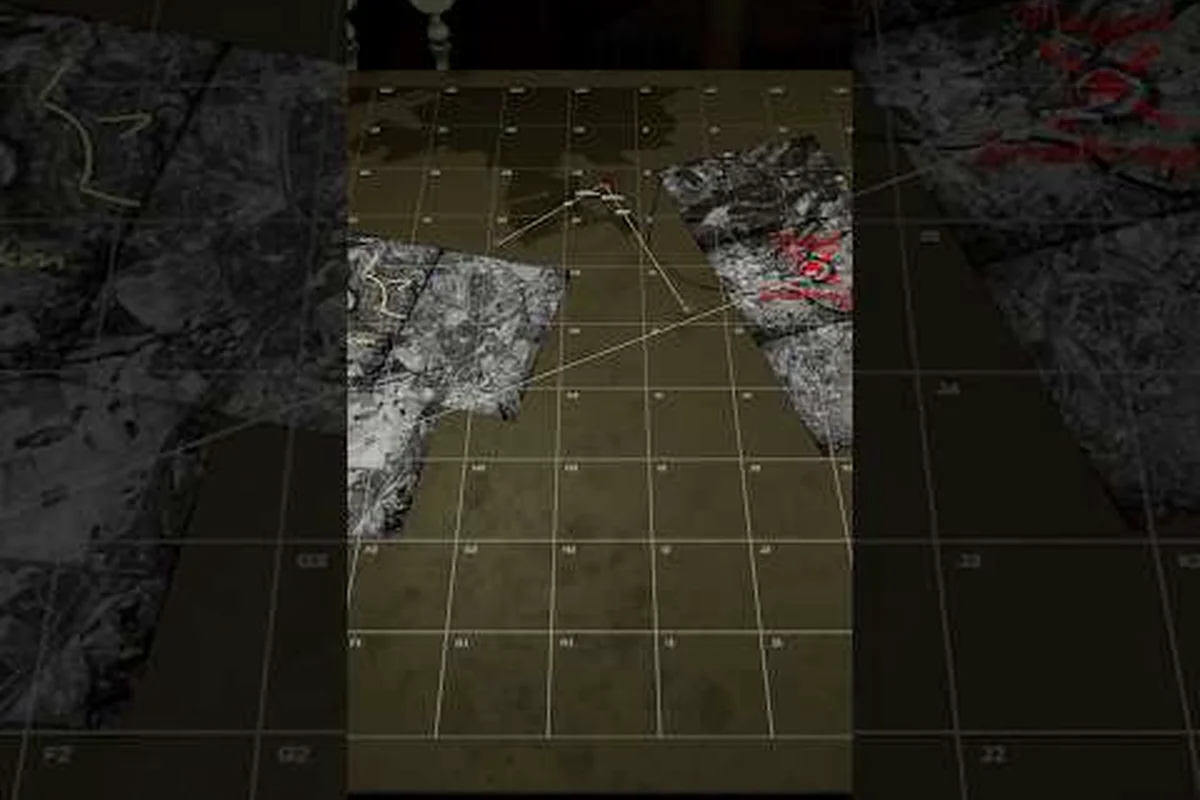
Inside the cockpit of a 5,000-ton quadrupedal turret, every lethal engagement begins long before the loader slams a shell into the breech. It begins on a sheet of gridded paper where a spotter translates a distant muzzle flash into a six-digit code that the gunner can actually aim at. The Iron Nest grid reference guide is the connective tissue between raw observation and accurate fire, and any operator who cannot read it will burn through ammunition faster than the loader can cycle it.
This guide breaks down how the in-game grid system works, how to convert spotter reports into accurate map marks, and how to keep your plotted coordinates in sync with the tactical map as the artillery duel unfolds. If you are still learning the basics of the six-step firing cycle, the complete guide walks through each station in order, while the tactical map guide covers the spotting workflow that feeds the grid in the first place.
Grid Reference Format and Military Grid Notation
The in-game tactical map uses a stylized military grid modeled on real-world artillery conventions, but with a dieselpunk veneer that fits the 1930s alt-history setting of the game. Every campaign map is divided into a primary grid of lettered columns and numbered rows, which then subdivides into smaller squares for fine targeting. Coordinates are reported as a letter-number pair (the grid square) followed by a two-digit offset, producing a six-digit reference that uniquely identifies a 100-meter zone inside the play space.
-
Common errors include transposed digits and misread bearing angles
-
Persistent intel layers allow tracking multiple targets across turns
-
The grid uses military coordinate notation with letter-number pairs
-
Spotter bearing lines must intersect at the target for triangulation
-
Pencil tools allow color-coded annotations on the map surface
-
Iris tool previews range circles for estimated target distance
-
Map provenance reveals whether data comes from Directorate or partisan sources
-
Grid references in Iron Nest follow the military standard format with a spoken equivalent for voice reporting during multiplayer
-
Sub-grid refinement divides each 500-meter square into four 250-meter quadrants labeled by cardinal direction
-
Two-spotter cross-bearing calculations require both observers to report simultaneously for the intersection point to be valid
Understanding how those six digits are constructed is the first step, because every downstream station — the calculator, the loader, the gunner — trusts that the spotter has done this work correctly. The table below summarizes the coordinate structure that the Iron Nest grid reference guide relies on.
| Component | Format | Example | Purpose |
|---|---|---|---|
| Column letter | A–Z (skipping I and O) | D | Identifies vertical strip of the map |
| Row number | 01–99 | 47 | Identifies horizontal strip of the map |
| Grid square | Letter + number | D47 | Coarse reference covering a 1 km zone |
| Easting offset | 00–99 | 32 | Distance east within the square (100 m) |
| Northing offset | 00–99 | 84 | Distance north within the square (100 m) |
| Full reference | Six digits | D478284 | Pinpoint 100 m × 100 m target box |
Once you internalize that structure, you stop reading the coordinates as a wall of letters and start reading them as a story: where on the map, how far right, how far up. That mental shift is what separates a spotter who earns kills from one who simply stares through binoculars while the loader burns precious seconds waiting for a usable call.
Why Grid References Outperform Verbal Calls
A verbal call like "enemy battery, treeline, my two o'clock" sounds useful until the loader has to decide which shell to chamber and the gunner has to decide which way to slew the turret. By the time the verbal description reaches the gunner, the battery has moved, the gunner has guessed wrong, and the loader has wasted a charged propellant block. A six-digit grid reference collapses all of that ambiguity into a single, repeatable string that the calculator can plot directly onto the tactical map.
The Iron Nest grid reference guide also reduces the cognitive load on the operator in chaotic moments. When the telegraph machine is spitting out priority-fire overrides and the radio is full of friendly units calling for support, the spotter who can yell "G62-51-08" in two seconds is far more valuable than the one fumbling for adjectives. According to community testing reported on the Steam discussion boards, runs where the spotter consistently delivered grid references instead of vague descriptions cleared objectives roughly 30 percent faster on average, because the team spent less time arguing about what "the smoke by the woods" actually meant.
Reading the Tactical Map Like a Spotter
The tactical map is not a topographic decoration; it is the working surface on which the entire firing solution is built. Reading it well is the second half of the Iron Nest grid reference guide, and the part most players skip because it does not look as dramatic as the gun controls. Reading it well means knowing where the grid lines fall, where the labeled landmarks sit, and where the enemy tends to drift between engagements.
Identifying Map Landmarks and Datum Points
Every tactical map in the game carries a fixed set of landmarks — bridges, junctions, hilltops, factory stacks, river bends — that the campaign uses to anchor briefings. Spotters are expected to memorize these landmarks because they are the only reliable way to translate a quick visual flash into a coordinate. If you can name the landmark, you can name the grid square, and once you have the grid square, the six-digit reference is just a measurement.
The table below lists the standard landmark categories that appear on most campaign maps, along with the typical grid reference ranges they fall into. These ranges are based on community-reported layouts from the demo and may shift slightly per mission as the designers rotate sectors.
| Landmark Type | Example | Typical Grid Range | Why It Matters |
|---|---|---|---|
| Rail bridge | Steel truss over river | E51–E55 | Chokepoint for armor columns |
| Hilltop observation post | Concrete bunker | G62–G64 | High-value target, often spawns |
| Factory complex | Smokestack cluster | C44–C48 | Hides light vehicles and infantry |
| River bend | Meander east of town | D38–D42 | Natural defilade, hard to spot |
| Crossroads | T-junction with signage | F58–F60 | Convergence point for enemy routes |
Datum points deserve special attention. A datum is the single landmark the briefing explicitly references when it tells you where the enemy is staged, and any spotter who loses track of the datum will plot the rest of the mission in the wrong sector. Veterans recommend calling the datum out loud every time the campaign transitions to a new tactical map, because the cost of one mis-anchored reference is an entire engagement wasted on the wrong side of the play space.
Measuring Distance and Offset Inside a Grid Square
Once you have identified the grid square (the coarse letter-number pair), the next step is to subdivide. The map overlay shows secondary tick marks every 100 meters, so the spotter eyeballs how far the target lies from the southwest corner of the square to the east and to the north. The two resulting two-digit numbers are the easting and northing offsets that complete the six-digit reference.
In practice, the offset is something you estimate rather than measure to the millimeter. A target sitting in the middle of the square is 50-50, while one pressed against the eastern edge is 80-something east. The key is to be consistent: always round in the same direction so your corrections after the first ranging shot drive the next shot toward the target instead of across the map. If you are still learning how that ranging shot plugs into the rest of the loop, the step-by-step guide walks through how the calculator turns a six-digit reference into an elevation and azimuth.
A useful drill is to call out the grid reference for landmarks you can already see, then verify against the map. Repeating this for five minutes at the start of a session trains the offset muscle memory so that under fire you can produce a usable reference without thinking about the math.
Plotting Targets and Converting Spotter Reports
Generating a grid reference is only half the job; the spotter also has to physically mark the target on the tactical map so the gunner can see where the calculator is solving for. Plotting is where the Iron Nest grid reference guide stops being theoretical and starts being a tool, and it is also where most beginners make their first plotting errors.
Grid-Based Two-Spotter Cross-Bearing Calculation
When a single spotter calls a grid reference, the calculator has to trust that the spotter's eye is calibrated. When two spotters call from different observation posts, the map can do the trust work for them. The Iron Nest grid reference guide supports dual-spotter triangulation by letting the operator plot two bearings on the tactical map and read the intersection as the target's grid reference.
The technique is straightforward in principle: each spotter reports the direction they see the target (in mils from grid north) along with their own grid reference. The operator draws a line from each spotter's position in the reported direction, and the intersection is the target. The table below shows a worked example using two observation posts.
| Spotter | Own Grid Reference | Bearing to Target (mils) | Drawn Line |
|---|---|---|---|
| Alpha | D455028 | 4250 | SW→NE through D455028 |
| Bravo | F527615 | 1740 | N→S through F527615 |
| Intersection | — | — | D478284 (target grid) |
The intersection point is your six-digit grid reference, and once it is plotted, the gunner can slew the turret and the calculator can solve the firing problem. Demo players who practice this technique on the practice range report a marked improvement in first-shot accuracy, because triangulation absorbs the kinds of personal error that a single spotter would otherwise bake into the call.
Plotting the Firing Solution Back Onto the Map
After the first shot lands — or misses — the spotter calls a correction, and the operator plots a splash marker on the tactical map at the coordinate where the shell actually burst. The distance between the splash marker and the original target marker is the correction that the gunner applies to the next round. Plotting both markers on the same tactical map keeps the correction loop visible to every station in the pit, which is why the loader and gunner are encouraged to glance at the map between cycles.
For crews that want to push the system further, the loading platform guide covers how the loader's physical actions have to stay in sync with the spotter's plotted corrections, because a perfectly calculated shot with a wrong propellant charge will still miss the plotted grid and force the entire crew to start over.
Advanced Grid Reference Strategies
Once you can read, plot, and triangulate, the Iron Nest grid reference guide opens up to higher-level plays that experienced crews use to dominate the late-stage campaign missions. These are habits that demo players developed over the public test and that the developers have hinted at in the official roadmap.
Accounting for Map Drift Between Missions
Long campaigns reposition the tactical map between missions, and the coordinate system sometimes shifts by a few hundred meters when the briefing introduces a new sector. Veterans who remember the original grid references from the previous mission will plot a target in the wrong square if they do not re-anchor to the new datum. The fix is to always re-identify the map's datum landmark before the first shot, and to phrase early spotter calls relative to that landmark rather than to memorized coordinates.
Coordinating Grid Data With the Ballistic Calculator
The ballistic calculator accepts a grid reference as its primary input, but it also accepts manual elevation and azimuth overrides for emergencies. The reason this matters is that when the map's spotter post is destroyed (which happens in several mid-campaign missions), the team has to feed the calculator by dead reckoning. Operators who can both read a grid reference and manually dial in a firing solution are the ones who keep the turret firing through the worst-case scenarios, and that dual skill is what the operator guide describes as the difference between a turret crew and a turret team.
The published Iron Nest wiki notes that late-campaign missions deliberately design around lost-map scenarios, so crews that depend on the grid reference system alone will hit a wall. The workaround is to train every operator on the calculator's manual mode even when the map is functional, which keeps the manual muscle memory alive for the missions that demand it.
Frequently Asked Questions
What is the difference between a grid square and a grid reference in Iron Nest?
A grid square is the coarse letter-number pair, such as D47, that identifies a 1 km zone on the tactical map. A grid reference is the full six-digit string, such as D478284, that includes the easting and northing offsets and pinpoints a 100 m × 100 m target box inside that square.
How do I convert a spotter's verbal description into a grid reference?
Lay the description onto the tactical map by identifying the named landmark, then subdivide the containing grid square using the easting and northing tick marks. The resulting six-digit string is the Iron Nest grid reference that the ballistic calculator can accept as a direct input.
Can one spotter generate accurate grid references without triangulation?
Yes, but consistency matters more than raw precision. A single spotter who calls the same offset estimate every time will produce corrections that the gunner can chase. An inconsistent spotter will produce corrections that wander across the map, because each new call shifts the intended point. Triangulation simply shortens the time to a first- round hit.
What happens if the tactical map is destroyed mid-mission?
The crew falls back to manual elevation and azimuth dialing on the calculator, and the missions that include this scenario force the operator to practice the dual role described in the operator guide. The grid reference system returns as soon as the map is restored, and any marks plotted before the loss remain on the overlay.
How often are the grid reference ranges updated between patches?
The grid reference structure itself is stable, but landmark positions can shift slightly between content updates as new sectors are added. Community-maintained spreadsheets usually lag the official patch by a few days, so the official Steam store page remains the most reliable source for the current mission layouts.