
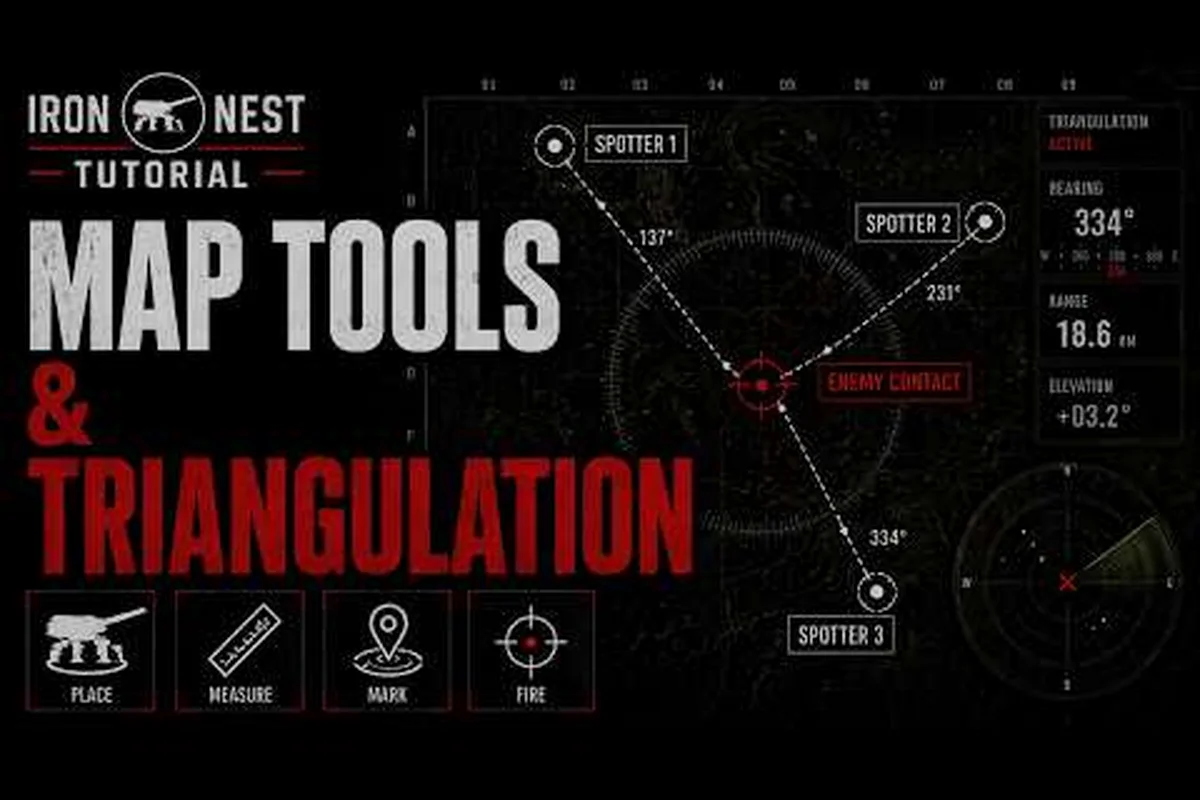
Tactical Map Drawing Tools in Heavy Turret Simulator
In Heavy Turret Simulator, every successful salvo starts on the table, not at the gun. The pencil tool and the Iris tool are the two instruments a spotter uses to turn vague "enemy spotted, northeast" chatter into a precise, plotted coordinate that a turret crew can dial in. Without these tools, even the most careful Iron Nest map drawing session collapses into guesswork, wasted ammunition, and a dead observer.
-
Iris tool previews range circles for estimated target distance
-
Map provenance reveals whether data comes from Directorate or partisan sources
-
Coordinate plotting speed directly affects challenge mode scores
-
Common errors include transposed digits and misread bearing angles
-
Persistent intel layers allow tracking multiple targets across turns
-
The grid uses military coordinate notation with letter-number pairs
-
Spotter bearing lines must intersect at the target for triangulation
-
The pencil tool's red marker identifies confirmed enemy positions while yellow marks estimated or unverified contacts
-
The Iris trajectory preview shows the projected impact point and the full ballistic arc from turret to target
-
Combining pencil markers with Iris overlay provides visual confirmation that the firing solution will hit the marked position
The game ships with a Steam store page that advertises a serious tactical sandbox, but it is the tactical-map workflow on the desk in front of your spotter that actually determines whether you clear a wave or eat a rocket. Iron Nest map drawing is the connective tissue between observer reconnaissance and turret action: the pencil tool stamps coordinates on the table, the Iris tool previews how a future shot will land, and your job is to keep the table clean enough that the next spotter can read it at a glance.
This guide focuses narrowly on those two tools and the map-drawing habits that surround them. If you have not yet set up a spotting routine or learned how the coordinate system is structured, start with the tactical map guide for spotters and the coordinate system breakdown before continuing. The workflow below assumes you already understand the 20x10 grid, sub-cell naming, and the role of the Tactical Map in the firing loop.
Pencil Tool Mechanics and Color Coding
The pencil tool is the primary marking instrument on the map table, and Heavy Turret Simulator hands you three distinct pencil colors, each with a different visibility lifetime and purpose. Choosing the wrong color is one of the most common reasons a Iron Nest map drawing board turns into noise before a wave even resolves.
The pencil tool itself is a small clickable icon at the corner of the map interface. Clicking it opens a swatch of three colors — red, yellow, and white — and each subsequent click on the grid drops a dot in that color. The colors are not cosmetic: they control how long a coordinate lingers on the board, and that lifetime cascades into how clearly your spotter can communicate with the turret crew.
Red Pencil — Confirmed Enemy Contacts
The red pencil is reserved for verified enemy positions. Use it after a spotter has positively identified a target, watched it hold its position, and confirmed its distance via the Ballistic Calculator-driven ranging shots. A red mark tells every other role on the crew, "this dot is real, prioritize it."
Red marks stay visible for the longest of the three colors, which makes them expensive. If you mark a transient truck passing through a corridor with red, the dot lingers long after the truck is gone and clutters future firing solutions. Reserve red for armored threats, fixed gun nests, and command vehicles.
Yellow Pencil — Suspected or Provisional Targets
The yellow pencil flags contacts that exist but have not been confirmed. A flash of movement behind a ridge, a heat signature that disappears before triangulation completes, or a target that the Ballistic Calculator cannot range because the spotter's line of sight is blocked — all of those deserve a yellow dot rather than a red one.
Yellow dots fade after roughly one full wave cycle in community testing, which keeps the board from accumulating stale intel. Treat the yellow pencil tool as your scratch layer: a temporary reminder for the spotter team, not a permanent record for the turret crew.
White Pencil — Neutral Reference Marks
The white pencil is the easiest color to misuse. White marks do not represent enemy positions; they represent terrain features, reference landmarks, and grid alignment cues that your spotter draws to keep the 20x10 grid legible as the wave evolves. Use white to outline a ridge, mark an observation post, or sketch the rough path a convoy tends to take. They are the bones of a clean Iron Nest map drawing board.
| Pencil Color | Purpose | Visibility Lifetime | Common Mistake |
|---|---|---|---|
| Red | Confirmed enemy contact | Longest, persists across waves | Marking moving targets, cluttering the board |
| Yellow | Suspected or unconfirmed contact | Fades after one wave cycle | Treating it like red, losing intel on confirmation |
| White | Terrain and reference marks | Permanent until cleared | Skipping it entirely, leaving the board without structure |
The pencil tool also supports erasing individual dots, which becomes critical once a confirmed red mark needs to be downgraded because the target was destroyed. Combine erasing with the map cleanup habits covered later in this guide so the board never freezes in a single visual state.
Iris Tool Coverage and Range Preview
Where the pencil tool records what has been seen, the Iris tool previews what can be hit. Clicking the Iris tool opens a circular overlay on the grid, sized to match the lethal radius of your currently loaded shell at your currently dialed-in elevation. Hovering the Iris across the map tells you, in real time, whether a target sitting on a coordinate would be inside the burst, on the edge, or completely untouched.
How the Iris Overlays the Grid
The Iris appears as a soft, semi-transparent disc with a faint crosshair at its center. The disc's diameter is calculated from three live inputs: the Powder Charge you have selected on the Firing Card, the elevation you have dialed in via the gun-laying controls, and the armor-piercing (AP) or high-explosive (HE) round currently in the breech. Because all three of those inputs change every time you fire, the Iris disc size and shape literally shift as you adjust your gun, which is why advanced crews treat the Iris tool as a live calculator rather than a static preview.
| Iris Input | Effect on Overlay | Practical Reading |
|---|---|---|
| Powder Charge 1–2 | Tiny disc, tight cluster | Close infantry and dugouts |
| Powder Charge 3–4 | Medium disc | Light vehicles and scout positions |
| Powder Charge 5–6 | Large disc, soft edges | Fortified bunkers and convoys |
| Elevation shift | Disc moves north/south on grid | Use to walk the burst onto a target |
| AP vs HE swap | Disc edge sharpness changes | HE softens edges, AP keeps a hard kill zone |
The Iris tool is also how you sanity-check pencil tool marks before you commit to a shot. If the red dot you just plotted for a confirmed enemy tank sits just outside the edge of the Iris disc with your current elevation, you already know you need to step up one Powder Charge or walk the gun three degrees before calling the firing solution.
For crews that want to push further into the math behind the overlay, the Iron Nest systems page has the most detailed write-up of how Powder Charge numbers map to muzzle velocity and therefore to burst spread. The Iris tool in your actual session will always reflect the current card rather than a theoretical maximum, which is why experienced players re-check the overlay every time they swap rounds.
Iron Nest Map Drawing Workflow Step by Step
A clean Iron Nest map drawing session is not a single action; it is a sequence of small actions, each owned by a specific role. The pencil tool, the Iris tool, the map cleanup, and the verbal handoff all happen in roughly the same order every wave, and skipping any step degrades the next one.
Spotter vs Turret Plotting
The single most important habit to learn is that the spotter draws, and the turret reads. When turret crews start plotting their own pencil marks to "double-check" the spotter, the board ends up with two overlapping coordinate systems and neither side trusts the other. Lock the rule in early: the Spotter owns the pencil tool, the Turret owns the Ballistic Calculator, the Firing Card, and the gun controls.
| Role | Tool Ownership | Action on the Map | Verbal Output |
|---|---|---|---|
| Spotter | Pencil tool (all three colors) | Plots and erases marks | Calls bearing, range, target type |
| Turret | Ballistic Calculator, Firing Card | Reads marks, dials gunlay | Calls "shot out," reports splash |
| Commander | Iris tool (optional) | Cross-checks burst placement | Authorizes follow-up shots |
| Observer | Observation photos | Marks photo reference points | Reads photo coordinates aloud |
Once this division is enforced, the pencil tool marks on the board become a reliable shared reference rather than a contested scratch pad. If your crew is still building this habit, the first firing solution walkthrough shows how a clean handoff plays out in the opening minutes of a mission.
Reading the 20x10 Grid
The Tactical Map in Heavy Turret Simulator is a 20x10 grid, with each main cell split into four sub-cells. Coordinates follow a letter-number convention (column letter, row number, sub-cell letter) that the game calls out in the bottom-left corner whenever you hover a cell. Getting this notation right is the difference between a clean call of "Bravo 7 Charlie" and a confused "somewhere in the middle."
The grid is also where the Iris tool earns its keep during Iron Nest map drawing. Because the grid is so tightly subdivided, a half-cell offset between the spotter's pencil mark and the turret's gunlay can be the difference between a center-mass hit and a near miss. Advanced crews establish a one-cell margin around every red mark and only commit to firing once the Iris disc fully engulfs that margin.
Clearing the Map and Coordination Habits
A Iron Nest map drawing board that looked crisp in minute one can become unreadable by minute five if no one owns cleanup. Map clearing is its own discipline, and it deserves its own section because it is the habit most crews skip and regret.
The simplest rule is to erase yellow marks the moment they are resolved, whether that means the target was confirmed, destroyed, or lost. Yellow is a working memory, not a permanent record, and every yellow mark you leave on the board is a small tax on the next spotter. Red marks can linger longer because they represent confirmed threats, but once a red-marked vehicle has been visibly destroyed and the wave has rolled over, the dot should also be cleared so the next wave starts on a blank canvas.
White reference marks are the only marks that should persist across waves. If you have sketched a ridge line or an observation post in white, keep it, because future waves will reuse the same terrain features and that sketch will save your spotter a full reorientation. The pencil tool's eraser mode handles all three colors, and a quick pass every wave boundary keeps the board from solidifying into chaos.
Three coordination habits tighten the workflow further. First, standardize your color rules verbally at the start of every session so a new spotter cannot accidentally swap red and yellow. Second, run the Iris tool over every red mark before firing, because a stale mark from two waves ago may now sit inside the wrong disc size after a Powder Charge change. Third, tie map cleanup to wave boundaries rather than real-time events, which gives one person explicit ownership of the board between waves rather than everyone reaching for the eraser mid-engagement.
For a broader tour of the other instruments on the table, including the Teleprinter that feeds you high command orders and the Firing Card that records the latest solution, the map tools overview covers everything that sits next to the pencil tool on your desk. Iron Nest map drawing is at its best when every tool on that desk is in active rotation, and the pencil and Iris are the two you will touch on every single shot.
Frequently Asked Questions
What does the pencil tool do in Heavy Turret Simulator?
The pencil tool drops colored dots on the 20x10 Tactical Map to mark enemy contacts and reference features. Red marks confirmed targets, yellow marks suspected targets, and white sketches terrain for orientation. Map proficiency reduces the time from spotter report to first round downrange.
How is the Iris tool different from the pencil tool?
The pencil tool records where enemies are, while the Iris tool previews where your next shot will land. The Iris overlay resizes with your current Powder Charge, elevation, and shell type, so it doubles as a live firing-solution check. Map proficiency reduces the time from spotter report to first round downrange.
When should I use red versus yellow pencil marks?
Use the red pencil only after a spotter has confirmed a target via ranging shots or photo intel. Use the yellow pencil for fleeting contacts, blocked line-of-sight targets, or anything the Ballistic Calculator has not yet resolved. Map proficiency reduces the time from spotter report to first round downrange.
Can the turret crew plot their own marks on the Tactical Map?
Yes, but experienced crews avoid it. Keep the pencil tool with the spotter and let the turret crew read marks rather than add to them, which prevents double-plotted coordinates and keeps the board trustworthy. Map proficiency reduces the time from spotter report to first round downrange.
How do I keep my Iron Nest map drawing board readable across waves?
Erase yellow marks after they resolve, keep white terrain sketches, and tie all cleanup to wave boundaries. Re-run the Iris tool over any surviving red marks before firing, because Powder Charge or shell changes shift the burst footprint. The tactical map is the foundation of every fire mission because all downstream calculations depend on an accurate range measurement.