
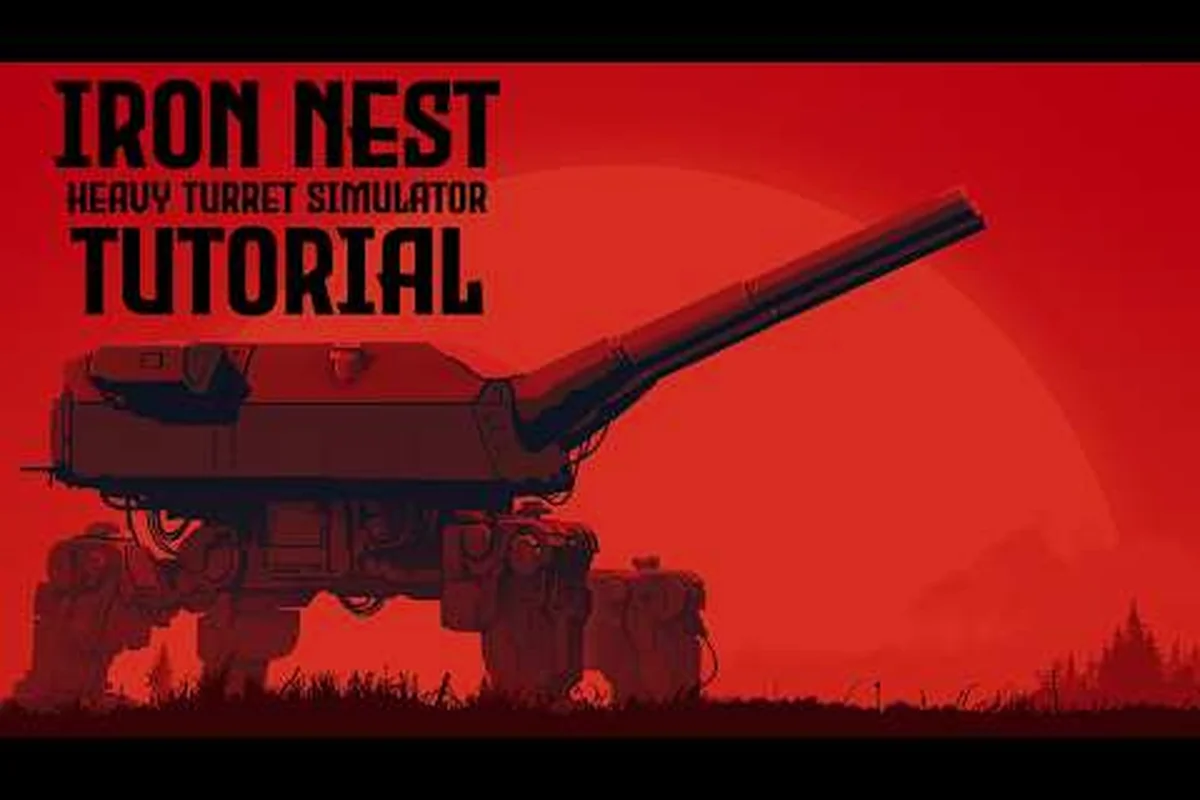
The turret controls system in Iron Nest is a core component of the artillery simulation, providing crews with the tools and mechanics they need to execute precise fire missions under varying tactical conditions. This category overview links to every dedicated turret controls article on our site and summarizes the key concepts so you can navigate the full guide collection efficiently.
Turret Controls Category Content and Navigation
The turret controls category covers the primary mechanical systems that Iron Nest players interact with during every mission. From fundamental controls to advanced techniques, each article in this category addresses a specific aspect of the turret controls subsystem with the depth that competitive and campaign players need.
-
The traverse wheel controls bearing direction and requires larger physical movements than the elevation handwheel for coarse adjustments
-
Elevation precision down to 0.1 mils translates to roughly 1 meter of impact shift per 0.1 mil at 1,000 meters range
-
The loading platform sequence cannot be shortcut — safety interlocks add penalty delays if procedural steps are skipped out of order
-
Dual-barrel coordination requires precise timing between the loading platform and gunlayer station for alternating fire patterns
-
The shell selector lever's tactile detent positions allow experienced loaders to select ammunition types by feel without visual confirmation
| Article | Focus Area | Difficulty | Key Topics |
|---|---|---|---|
| Turret Rotation | Bearing controls | Beginner | Traverse wheel, dial reading |
| Elevation Handwheel | Vertical angle | Intermediate | Vernier scale, sub-mil precision |
| Loading Platform | Ammunition handling | Intermediate | Shell selector, breech sequence |
| Dual-Barrel Coordination | Advanced firing | Advanced | Alternating fire, timing windows |
Beginning Turret Controls Training
New operators should begin with the fundamental turret controls concepts before attempting advanced techniques. The game's tutorial introduces basic turret controls operations in Region 1, but the full depth of the system doesn't become apparent until later campaign regions where time pressure and target complexity increase substantially. Understanding the turret controls workflow — from initial setup through execution and correction — is essential for progressing beyond the early campaign.
Turret Mechanical Principles and Interconnections
The turret controls system in Iron Nest operates on several interconnected principles. First, every action at the turret controls station has a time cost that feeds into the overall mission timer. Second, the precision of each manual input (handwheel rotation, dial reading, lever position) directly affects the firing solution accuracy. Third, coordination between the turret controls operator and other crew stations — particularly the spotter and the ballistic calculator — determines whether the crew achieves first-round hits or requires multiple correction shots. Our complete guide provides the foundational workflow that connects all turret stations.
-
The traverse wheel controls bearing direction and requires larger physical movements than the elevation handwheel
-
Elevation precision down to 0.1 mils translates to roughly 1 meter of impact shift per 0.1 mil at 1,000 meters
-
The loading platform sequence cannot be shortcut — safety interlocks add penalty delays if steps are skipped
-
Dual-barrel coordination requires precise timing between the loading platform and gunlayer station
-
The shell selector lever's tactile detent positions allow experienced loaders to select rounds by feel
Precision and Speed Optimization Methods
Experienced crews develop muscle memory for common turret controls operations, reducing the time between receiving a firing solution and executing it. The key advanced techniques include pre-positioning the handwheel during the calculator's computation phase, reading the dial vernier at sub-mil precision, and applying manual wind corrections based on observed fall-of-shot patterns rather than recalculating from scratch. These techniques each save 2-5 seconds per fire mission, which compounds dramatically across a full campaign operation.
Turret Controls Performance Benchmarks
Iron Nest tracks several performance metrics related to turret controls operations, and these metrics feed into the overall crew evaluation score that determines campaign progression and unlock eligibility. Turret control mastery is the mechanical foundation upon which all other skills are built.
| Metric | Measurement | Good Score | Expert Score |
|---|---|---|---|
| Traverse Speed | Seconds to set bearing | < 10s | < 5s |
| Elevation Precision | Mil accuracy of set angle | ±2 mils | ±0.5 mils |
| Loading Cycle | Seconds shell-to-breech | < 12s | < 7s |
| Dual-Barrel Sync | Milliseconds between barrels | < 500ms | < 200ms |
Turret Controls Error Diagnosis and Drills
Most turret controls errors fall into three categories: timing errors (acting too slowly or out of sequence), precision errors (misreading dials or setting incorrect values), and coordination errors (mismatching the firing card between stations). Each error type has a recognizable signature and a specific correction drill.
| Error Type | Signature | Root Cause | Correction Drill |
|---|---|---|---|
| Traverse overshoot | Bearing set 5-10 mils past target | Handwheel momentum | Practice deceleration before target bearing |
| Elevation drift | Post-fire angle shift > 2 mils | Recoil disturbance | Re-verify elevation after every shot |
| Shell misload | Wrong shell type in breech | Selector lever skip | tactile detent verification before opening breech |
Turret Controls Article Directory
Each turret controls subsystem has its own dedicated guide covering specific controls, techniques, and tactical applications. Browse the full article list in the turret controls category sidebar, or start with the most-read guides for your experience level. Turret control mastery is the mechanical foundation upon which all other skills are built.
The Quadruped Turret Platform
Iron Nest's turret is mounted on a four-legged walking platform that provides both mobility and stability for artillery operations. The platform's mechanical design draws from early twentieth-century engineering concepts — specifically, the tractor-tread experiments and hydraulic stabilization systems that were being prototyped in European armories during the 1920s. Understanding how the platform's movement affects turret operations is essential, because every step the turret takes introduces micro-vibrations that can knock the elevation and bearing dials off their set positions. Our turret rotation guide explains how to compensate for platform movement during repositioning.
Turret Station Layout
The turret's interior is divided into four crew stations, each responsible for a distinct phase of the firing cycle. The command station (FDC) receives spotter reports and operates the ballistic calculator. The loading platform handles shell selection, powder charge assembly, and breech operations. The gunlayer station controls traverse (bearing) and elevation. The fuse station sets time fuses on shells that require airburst detonation. In single-player mode, the player manages all four stations sequentially; in multiplayer, each crew member takes one station.
| Crew Station | Primary Controls | Key Actions | Time Budget |
|---|---|---|---|
| Command (FDC) | Calculator, teleprinter | Input targeting data, compute solutions | 15-30s |
| Loading Platform | Shell selector, breech lever | Load round, set charge, close breech | 8-12s |
| Gunlayer | Traverse wheel, elevation wheel | Set bearing and elevation from firing card | 10-20s |
| Fuse Station | Fuse setter wrench | Set fuse time on timed shells | 5-8s |
Loading Platform Sequence Details
The loading platform is where the physical ammunition handling occurs, and it has the most complex mechanical sequence of any turret station. The loader must pull the shell selector lever to the correct position, retrieve the specified shell from the ready rack, insert it into the breech with the powder charge bag, and close the interrupted-screw breech mechanism. Each step has a specific order that cannot be shortcut — attempting to close the breech before the charge is seated triggers a safety interlock that adds a penalty delay. The loading platform sequence guide breaks down every step with timing targets for each proficiency level.
Dual-Barrel Coordination
Advanced turret operations unlock the dual-barrel coordination mechanic, where the turret's two barrels alternate fire to maintain continuous suppression. The coordination cycle requires precise timing between the loading platform and the gunlayer station, because Barrel B must fire before Barrel A has completed its recoil recovery. Our dual-barrel coordination guide provides the exact timing windows and the hand signals that multiplayer crews use to synchronize the alternating fire pattern.
| Cycle Step | Barrel A | Barrel B | Time Window |
|---|---|---|---|
| 1 | Fire | Loading | 0-8s |
| 2 | Recoil recovery | Ready to fire | 8-12s |
| 3 | Loading | Fire | 12-20s |
| 4 | Ready to fire | Recoil recovery | 20-28s |
Shell Selector Lever Mechanics
The shell selector lever is a mechanical dial on the loading platform that indexes through the turret's ready rack positions. Each position corresponds to a specific shell type, and the selector must be turned to the correct position before the breech is opened for loading. The selector has a tactile detent at each position, which allows experienced loaders to set the correct shell type by feel without looking at the dial. The shell selector lever guide covers the detent positions, the misalignment error pattern, and the recalibration procedure.
Elevation Handwheel Precision Techniques
The elevation handwheel controls the vertical angle of the barrel, and its precision determines whether the round lands at the correct distance from the target. The handwheel features a vernier scale that allows sub-mil precision readings down to 0.1 mils, which translates to approximately 1 meter of impact shift per 0.1 mil at 1,000 meters range. Reading the vernier correctly requires practice — the crew must align the closest vernier mark with the inner dial mark and add the values. Our elevation handwheel guide covers vernier reading technique, common misreading patterns, and the recoil-induced drift that can knock the dial off its set position after firing.
Traverse and Elevation Coordination
Setting both traverse and elevation from the firing card requires a specific sequence: traverse first (because it involves larger physical movements of the barrel), then elevation (which is a finer adjustment). Attempting to set elevation before traverse can result in the elevation being disturbed by the traverse movement, requiring a re-reading of the dial. The traverse and elevation guide explains the coordination sequence with timing targets for different proficiency levels.
| Setting | Typical Range | Precision | Time Required | Common Error |
|---|---|---|---|---|
| Traverse | 0-6,400 mils | ±1 mil | 5-10s | Misreading true vs magnetic bearing |
| Elevation | 0-1,300 mils | ±0.1 mil | 3-8s | Vernier alignment error |
| Wind correction | ±50 mils | ±1 mil | 2-5s | Wrong sign direction |
Turret Controls Category FAQ
What is the most important turret controls concept for new players?
The foundational concept is understanding that every turret controls action connects to a downstream effect on the firing solution. A small error at this station compounds through the ballistic calculator and the loading platform into a missed target, which is why precision always takes priority over speed for new crews learning the system.
How do turret controls skills transfer to challenge modes?
Challenge modes compress the time budget and increase target density, which means the turret controls skills you develop in the campaign — particularly response time and dial precision — become even more critical. Crews who can execute turret controls operations from muscle memory rather than conscious thought perform significantly better on leaderboards.
Should I practice turret controls operations in solo or multiplayer?
Both modes teach different skills. Solo mode builds individual muscle memory and dial-reading precision, while multiplayer mode develops the inter-station coordination and verbal communication protocols that are essential for competitive play. Ideally, crews should alternate between both modes during their training rotation.
Where can I find the complete list of turret controls articles?
The turret controls category sidebar shown alongside this article lists every dedicated guide in the collection. Each article focuses on a specific subsystem or technique, and together they provide comprehensive coverage of all turret controls operations in Iron Nest's artillery simulation.
Does the turret controls system change between campaign regions?
The underlying turret controls mechanics remain consistent across all fifteen campaign regions, but the time pressure, target complexity, and environmental conditions (wind, visibility, terrain elevation) increase progressively. The same skills apply everywhere, but the margin for error shrinks as you advance through the campaign.